EN

Rock Wool Sandwich Panel Installation: Fixing and Joint Sealing Checklist
For a project buyer, rock wool wall panel installation is not simply a matter of putting panels onto a frame. It is a coordinated envelope task: the supporting structure, panel layout, fasteners, joint seal, flashings, and adjacent trades all need to work together. This checklist gives a neutral way to prepare conversations with the panel supplier and installation team before work starts. It does not replace approved drawings, project specifications, local building rules, or the supplier’s current installation instructions.
In practical reviews, the most useful starting point is to treat rock wool wall panel installation as a system check rather than a panel-only check. A correctly specified panel can still face site issues if the support line is uneven, a fastener is mis-seated, or a joint is closed without the required sealing detail.
1. Confirm the installation basis before panels arrive
Before rock wool wall panel installation begins, gather the approved panel layout, elevations, fixing schedule, connection details, and the latest supplier guidance. Confirm the panel orientation, span direction, opening locations, corner treatment, base and head details, and the sequence for wall-to-roof or wall-to-flashing connections. These documents should identify which details are project-specific and which site checks must be recorded.
- Verify that the substrate or secondary steelwork is within the tolerances stated by the design team and panel-system instructions.
- Check that bearing faces are clean, accessible, and aligned before the first panel is lifted.
- Confirm lifting, storage, and handling arrangements so edges and joint profiles are not damaged.
- Identify penetrations, door frames, windows, and service connections before the installation sequence reaches them.
This preparation phase matters because rock wool wall panel installation depends on a consistent support plane. The first panel acts as the reference for subsequent panels; if it is out of line, later joint engagement and flashing fit-up can become harder to inspect.
2. Review the fixing plan as a system detail
For rock wool wall panel installation, use only the fastener type, length, washer or sealing arrangement, spacing, and support locations specified for the approved assembly. Exact patterns vary with panel profile, thickness, support material, wind actions, building height, edge zones, and the engineer’s design. A general checklist is useful, but it is not a substitute for a project fixing schedule.
Fastener checks during installation
- Match each fastener to the support material and approved fixing schedule.
- Position the panel fully on its intended support before fastening.
- Drive fasteners perpendicular to the panel face unless the system instructions state otherwise.
- Check that sealing washers or grommets seat evenly: a distorted seal, tilted screw, or over-driven head should be reviewed against the supplier guidance.
- Keep a visible, repeatable inspection routine at corners, panel ends, openings, and other locations called out in the drawings.
A useful quality-control question is: can the team see and verify every fixing point before the next operation hides it? In rock wool wall panel installation, a fastener is not only a structural item. Its placement and seating can also affect the weather-resisting layer at that location.
3. Check alignment before closing each joint
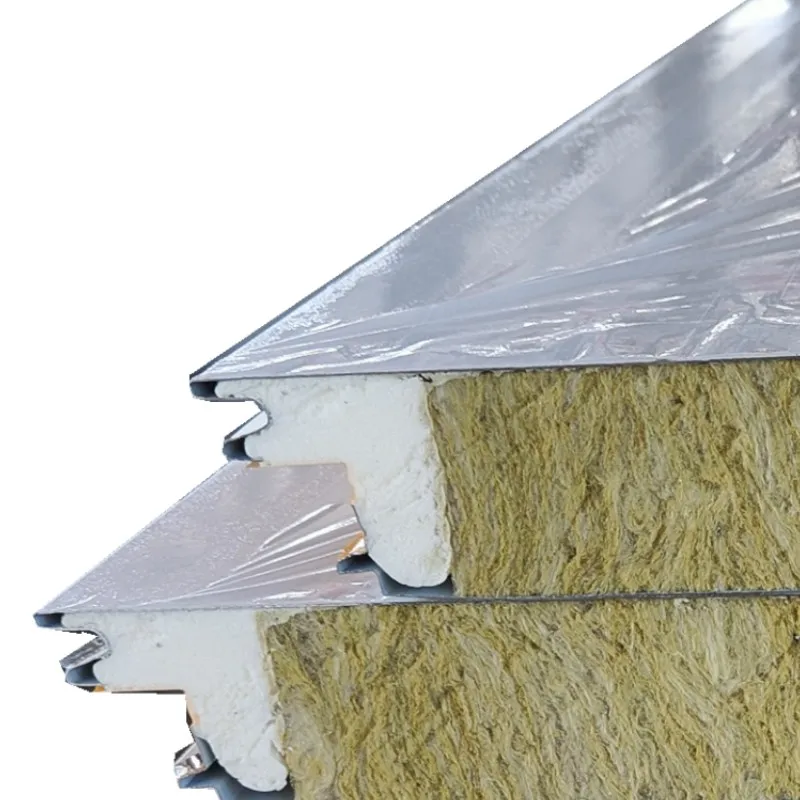
Joint performance begins before sealant is applied. During rock wool wall panel installation, inspect the panel edge, tongue-and-groove or other profile, alignment, and engagement before the panel is finally fixed. Do not force a damaged profile into place. Pause and follow the approved corrective process if the joint will not engage as intended.
- Inspect the mating edges for transport damage, debris, moisture, or protective-film residue that could interfere with the joint.
- Confirm that the new panel is plumb, level, and in the planned module before final tightening.
- Apply the specified sealing component at the location and in the manner required by the panel-system instructions.
- Engage the panel carefully and verify the joint line from the accessible face or faces.
- Record any adjustment before flashings or cover trims conceal the connection.
This is where a rock wool sandwich panel guide can help the procurement team ask clearer questions: Which sealant or tape is compatible with this panel profile? Where must it be continuous? Who checks the joint before closure? The answer should come from the approved project documentation, not from a generic rule copied between systems.
4. Make joint sealing a continuity inspection
In rock wool wall panel installation, joint sealing should be reviewed as a continuous path across panel-to-panel joints, corners, openings, base details, top details, and transitions to other materials. A neat external line alone does not confirm that the specified weather or air-seal detail has been formed.
| Inspection point | What the team should confirm |
|---|---|
| Longitudinal joint | The designated seal is installed continuously before final joint engagement, following the panel-system instructions. |
| Panel end and cut edge | Cutting, closure, and trim details follow the approved detail; exposed connections are not left for later assumption. |
| Corner and opening | Seal continuity is coordinated with flashings, frames, and adjacent trades. |
| Penetration | The penetration detail is reviewed for weather, fire, and movement requirements by the responsible project parties. |
For rock wool wall panel installation, avoid treating a sealant bead as a universal fix. Sealant choice, placement, surface preparation, fire performance, and compatibility depend on the approved panel-system detail and the intended exposure. If a detail is unclear, resolve it before covering the joint.
5. Coordinate flashings, penetrations, and weather exposure
Many handover problems arise where rock wool wall panel installation meets another trade. Review base channels, parapets, corners, window and door connections, service penetrations, and roof transitions early. Confirm who provides each component, who installs it, and when it can be inspected. If panels are exposed to rain during installation, follow the project and supplier instructions for handling, drying, and any required inspection before closure.
Where the panel scope includes a roof or wall product, buyers can review the product page for the 80 100 120Kg/M3 fireproof sandwich insulation board for roof/wall alongside the project drawings. The listing supports product discussion; the approved design still governs the final assembly and fixing arrangement.
6. Use a final handover checklist
Before sign-off, walk the completed elevation in a consistent direction. A final rock wool wall panel installation review should compare the visible work and records with the approved details, not rely on memory alone.
- Panel lines are straight and joint engagement is visually consistent.
- Specified fasteners are present, seated, and checked at required locations.
- Joint, perimeter, opening, and flashing seals are continuous where the drawings require them.
- Damaged faces, edges, trims, and protective-film remnants are addressed under the agreed site process.
- Changes, outstanding connections, and inspection records are handed to the responsible project team.
Use this rock wool wall panel installation checklist to structure a pre-start meeting, daily inspection route, and handover review. The goal is not to make a universal site instruction; it is to make fixing and joint-sealing responsibilities visible before they become concealed work.